Ah, the passport photo, a thing that lasts a decade (or more) and which has the power to haunt you every time you travel. I mean, it’s not very flattering is it? Neutral expression, boring background, it’s hardly worthy of your next photo dump, but it does serve a purpose. Without it, you wouldn’t be able to hop over to the luscious Costa Rican rainforests or the glittering Greek Islands! So, be thankful for it, and know that it doesn’t have to be as horrible as you fear. Taking the perfect passport photo is actually a lot easier than you might think!
So, if you’re due to renew your passport soon and want to make sure you look good for the next ten years, and also have it done with as much ease as possible, then you’re in the right place. This is our guide to perfecting your passport photo.


Passport photo guidelines
As your passport photo will make it onto an official identity document, it’s important that you adhere to the guidelines and take exactly the kind of photo that is asked of you. This includes how you pose and present yourself. This can vary from country to country, but the most generic and standard rules are the following:
- You must take the photo with a blank, preferably white, background. This can be a white wall at home or the plain background of a photo booth
- You must remove any accessories like glasses, hats, and jewellery. Certain pieces of jewellery or facial piercings can be kept, though if they produce a shadow or reflection they should be removed. Big earrings should be avoided if possible, and any necklaces should be tucked under the shirt
- If you usually wear any kind of head covering like a hijab or a turban, these can be kept on for your passport photo as long as your full face is visible. Coverings like burkas or niqabs however must be removed or altered in a manner that makes the face visible
- Keep your hair out of your face – your eyes and forehead must all be visible for the photo. If you can tuck your hair behind your ears, this is also preferred
- You must keep your expression blank – no cheeky smiles allowed
Looking good
Although your passport photo typically isn’t meant to be an Instagram-worthy selfie, it’s nice not to gasp in horror everytime you look at it before heading off on holiday. So, if you want to make a little bit of an effort and enjoy your photo for the next 10 years, it’s okay to make yourself look and feel good.
Pop on a little makeup, just enough to conceal any blemishes or dark circles you’d like to hide, maybe swipe on a little mascara to highlight those fluttery lashes, but DON’T go overboard! Unless you’re planning on travelling with a full face of makeup every single time, it’s usually best to keep your embellishments light and natural. You want your post 10+ hour flight-self to look like your glammed-up fresh-faced-self.
Scheduled your photo appointment after a crazy night out? Feeling ill and puffy with the flu? It’s best to reschedule your photo appointment where you can on these occasions, just so your photo doesn’t include blood-shot eyes or sweat at the brow.
Where to take the photo
Depending on how strict your embassy is, there’s a few options for where to take your passport photo. Which option you choose will also depend on how easy you want this process to be. Your best three options are the following: taking the photo at home, taking the photo at a photo booth, or hiring a photographer. Here’s a little more information on each option.
@findingfiona ❌ NO MORE bad passport photos – how to take ✨THE ✨ PASSPORT PHOTO for under $.20 🤯😍 If you're as extra as me, ily save this 😂🤞🏻 #traveltips #travel #vlog #passport ♬ original sound – findingfiona ✈️🤍
Taking the photo at home
Assuming you already have a good quality camera, taking the photo at home will be your cheapest option.
What you need:
- A blank white, cream, or light-grey background
- A good quality photography camera
- A camera stand or someone to take the photo for you
- A printer, colour ink, and glossy or matte printing paper
- Good lighting
Make sure you have followed the correct appearance guidelines before taking the photo, and place yourself in front of the blank background, making sure there’s nothing else in frame. The photo should include your full face, space at the top of your head, as well as the very tops of your shoulders.
If you’re taking your passport photo at home alone, set a timer that gives you enough time to settle in the frame and look good – a 10-second timer is probably your best bet.
If your phone has a good enough camera (iPhone 14 or Samsung Galaxy S23 for example), you can probably use this to take the photo instead of a regular camera, but just make sure the photo has good lighting and everything is in focus with good detail.
Once you’ve taken your passport photo and are happy with it, you’ll want to print it out and make sure you are using the correct measurements required for your country of nationality. These measurements can be checked on official government websites if in doubt. It’s best to print a few copies of the photo to have on hand just in case.
Taking the photo at a photo booth
Getting your passport photo taken at a photo booth is a very easy and efficient option, as you don’t have to worry about lighting, backgrounds, or camera quality. Plus, photo booths are easy to find as many supermarkets, malls, or high streets have them.
Before opting for a photo booth photo however, you should make sure they offer prints and measurements in line with each nation’s passport requirements. This is easy to double check if you know the brand of photo booth you’ll be visiting, by checking on their website, or at the photo booth itself before taking the photo.
Assuming all is well, taking your passport photo in a photo booth is easy! Simply select the options you need, adjust your seat in line with the face frame on the screen, and voilà. Photo booths are easy to use and they promise great quality photos, for only a small price.
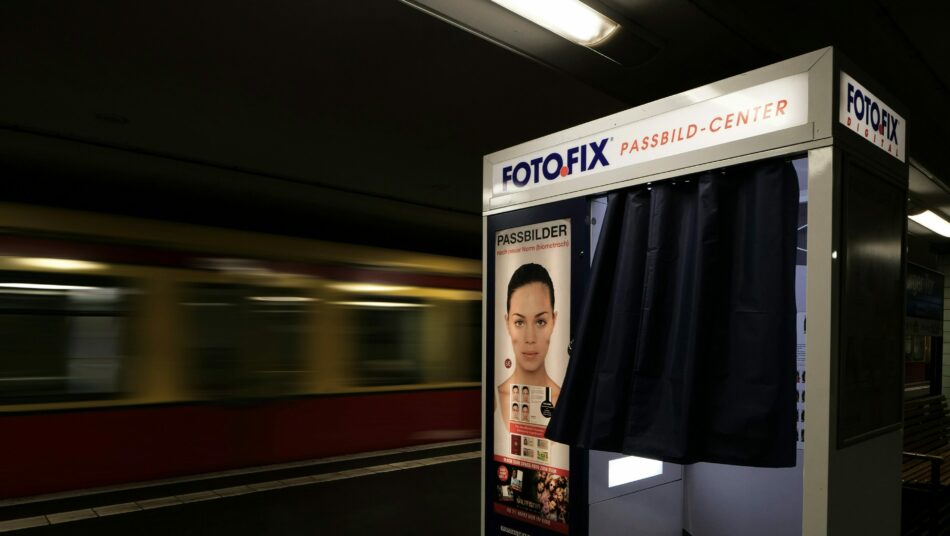
Image source: Julien Dumas / unsplash
Taking the photo with a professional photographer
If you really want to perfect your passport photo and look dazzling enough to make even TSA fall in love (kidding!), then getting your photo taken by a professional photographer is a good idea.
Though this option can be a little more expensive (depending on where you go), it’s not one that will break the bank, and it’s smart for those whose passports require very specific measurements or guidelines. This is super easy as well, as all you have to do is book your appointment, get ready, and show up! The photographer will take care of the lighting and background, the framing, and the printing. They also offer different papers to print, different sizes and measurements, etc. So you can really tailor your passport photo to exactly what you need.
Going to a professional photographer can also be the easiest option with anyone needing to have a passport photo taken of their newborn or young child.
Depending on where you are, professional photographers can be found in post offices, camera stores, certain pharmacies or chemists, and private studios.
Photo requirements by region
Generally, all passport photos are the same: you need your face, a neutral expression and background, and there you go. But the specific size of your photo can depend region to region, so here we’ve listed a few guidelines to keep in mind if you are from any of these nations.
EU Photos
If you are a resident in the EU, and/or have an EU passport, these are the general passport photo guidelines:
- 35x45mm measurements for print
- 826×1062 measurements for digital
- Background colour must be white
- Photo paper type must be matte
- The photo should be submitted within the last 6 months of it being taken
You can find more information on each EU country’s government site.
US Photos
If you are a resident in the US, and/or have a US passport, these are the general passport photo guidelines:
- 51x51mm measurements
- The head must be framed within 25-35mm
- Digital photo submissions are not usually accepted, all photos must be printed
- 2 photos will need to be submitted
- Background colour must be white or off-white
- Photo paper type can be either matte or glossy
- The photo should be submitted within the last 6 months of it being taken
You can find more information on the US’s official government site.
UK Photos
If you are a resident of the UK, and/or have a UK passport, these are the general passport photo guidelines:
- 35x45mm measurements for print
- 600×750 measurements for digital
- The face must be framed within 29-34mm
- Background colour must be white, off-white, or light grey
- Photos taken and printed by a professional photographer or photo booth are preferred
- Photo paper type must be matte
- The photo should be submitted within 1 month of it being taken
You can find more information on the UK’s official government site.
Australia Photos
If you are a resident of Australia, and/or have an Australian passport, these are the general passport photo guidelines:
- Measurements must be between 35-40mm wide and 45-50mm high
- The face must be framed within 32-36mm
- 2 photos will need to be submitted
- Background colour must be white or light-grey
- Photo paper type should be matte
- The photo should be submitted within 6 months of it being taken
You can find more information on Australia’s official government site.